Web Performance Optimization of a Single-Page-App and web fonts
March 16, 2017
0 comments Web development, JavaScript, React
tl;dr; Don't worry so much about your bloated JavaScript and how to async it. Worry about your CSS and your Web fonts. Here I demonstrate a web performance optimization story with Webpagetest.org results demonstrating the improvements.
The app playground
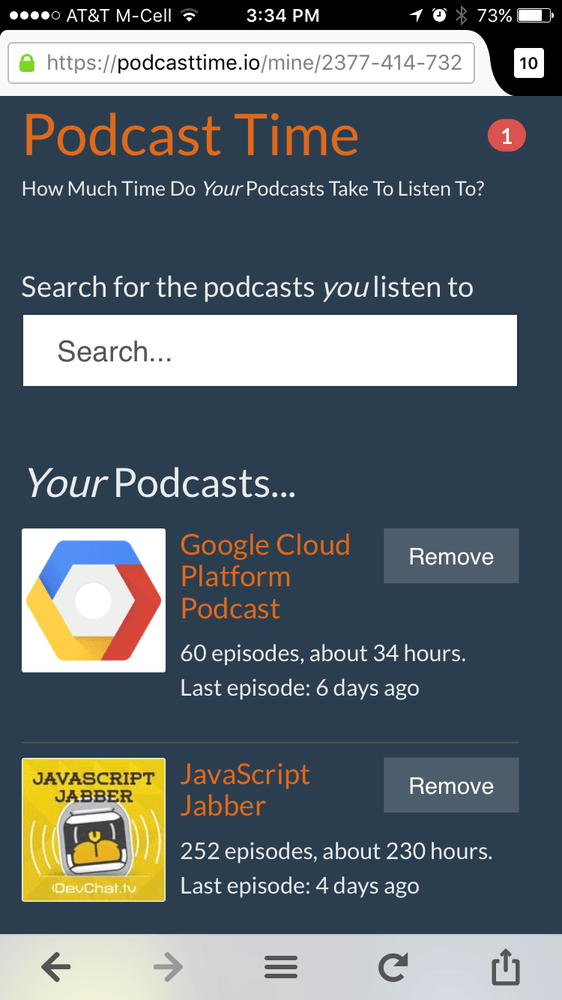
I have a little app called Podcast Time. It's a single-page-app that renders all the functionality in React with the help of MobX and I use Bootstrap 4 and Bootswatch to make it "pretty". And that Bootswatch theme I chose depends on the Lato font by Google Fonts.
I blogged about it last month. Check it out if you're curious what it actually does. As with almost all my side-projects, it ultimately becomes a playground to see how I can performance optimize it.

The first thing I did was add a Service Worker so that consecutive visits all draws from a local cache. But I fear most visitors (all 52 of them (I kid, I don't know)) come just once and don't benefit from the Service Worker. The compiled and minified JavaScript weighs 124 KB gzipped (440 KB uncompressed) and the CSS weighs 20 KB gzipped (151 KB uncompressed). Not only that but the bootstrap.min.css contained an external import to Google Fonts's CSS that loads the external font files. And lastly, the JavaScript is intense. It's almost 0.5 MB of heavy framework machinery. Of that JavaScript about 45 KB which is "my code". By the way, as ES6 code it's actually 66 KB that my fingers have typed. So that's an interesting factoid about the BabelJS conversion to ES5 code.
Anyway, to make site ultra fast the bestest thing would be to rewrite all the JavaScript in vanilla JavaScript and implement, with browser quirks (read: polyfills), HTML5 pushState etc. Also, I guess I should go through the bootstrap.css file and extract exactly only the selectors I'm actually using. But I'm not going to do that. That would be counter productive and I wouldn't have a chance to add the kind of features I have and can add. So that fat JavaScript and that fat CSS needs to be downloaded.
So what can I do to make that slightly less painful? ...when Service Workers isn't an option.
1. The baseline
Here's the test results on Webpagetest.org
Click on the first Filmstrip View and notice that the rendering both starts and finishes between the 3.0 and 3.5 second mark. The test is done using Chrome on what they call "Mobile 3G Fast".
2. Have some placeholder content whilst it's downloading
I poked around at the CSS to get some really basics out of it. The background color, the font color, the basic grid. I then copied that into the index.html as an inline stylesheet. You can see it here.
The second thing I did was to replace all <link rel="stylesheet" href="..."> meta tags with this:
<link rel="preload" href="FOO.css" as="style" onload="this.rel='stylesheet'">
<noscript><link rel="stylesheet" href="FOO.css"></noscript>
Also, near the bottom of the index.html I took the loadCSS.js and cssrelpreload.js scripts from Filament Group's loadCSS solution.
And lastly I copied the header text and the sub-title from the DOM, once rendered, plus added a little "Loading..." paragraph and put that into the DOM element that React mounts into once fully loaded.
Now the cool effect is that the render blocking CSS is gone. CSS loads AFTER some DOM rendering has happened. Yes, there's going to be an added delay when the browser has to re-render everything all over again, but at least now it appears that the site is working whilst you're waiting for the site to fully load. Much more user-friendly if you ask me.
Here's the test results on Webpagetest.org
Click on the first Filmstrip View and notice that some rendering started at the 0.9 second mark (instead of 3 seconds in the previous version). Then, after the browser notices that it's not the right font so it blanks the DOM, waits for the web font to load and around the time the web font is loaded, the JavaScript is loaded and ready so it starts rendering the final version at around the 2.8 second mark.
Note that the total time from start to finish is still the same. 3.1 second vs. 3.5 second. It's just that in this second version the user gets some indication that the site is alive and loading. I think the pulsating "Loading..." message puts the user at ease and although they're unhappy it still hasn't loaded I think it buys me a smidge of patience.
3. Hang on! Are web fonts really that important?
That FOIT is still pretty annoying though. When the browser realizes that the font is wrong, it makes the DOM blank until the right font has been loaded. My poor user has to stare at a blank screen for 1.3 seconds instad of seeing the "Loading..." message. Not only that but instead of just saying "Loading..." this could be an opportunity to display something more "constructive" that the user can actually start consuming with their eyes and brains. Then, by the time the full monty has been downloaded and ready the user will not have been waiting in vain.
So how important are those web fonts really? It's a nerdy app where search, content and aggregates matter more than the easthetic impression. Sure, a sexy looking site (no matter what the context/environment) does yield a better impression but there's tradeoffs to be made. If I can load it faster, my hunch is that that'll be more impressive than a pretty font. Secs sells.
I know there are possible good hacks to alleviate these FOIT problems. For example, in "How We Load Web Fonts Progressively" they first set the CSS to point to a system font-family, then, with a JavaScript polyfill they can know when the external web font has been downloaded and then they change the CSS. Cute and cool but it means yet another piece of JavaScript that has to be loaded. It also means "FOUT" (Flash Of Unstyled Text) which can disturb the view quite a lot if the changed font changes layout shifts.
Anyway, I decided I'll prefer fast loading over pretty font so I removed all font family hacks and references to the external font. Bye bye!
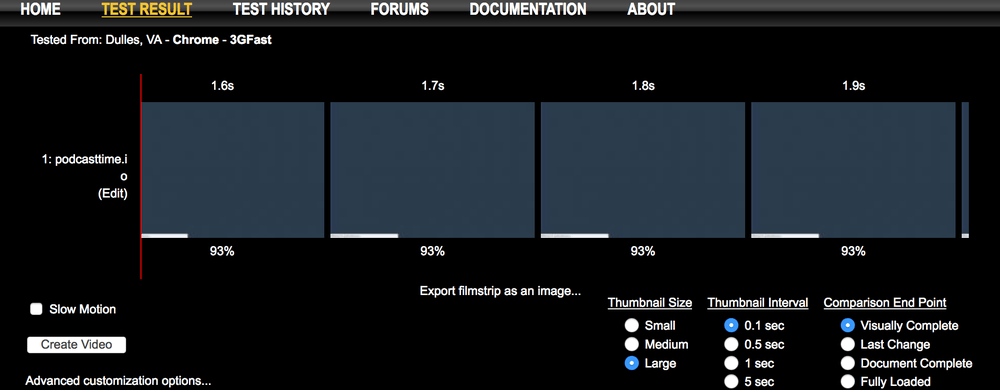
Here's the test results on Webpagetest.org
Click on the first Filmstrip View and notice that the rendering starts already at 1.2 seconds and stay with the "Loading..." message all the way till around 3.0 seconds when both the CSS and the full JavaScript has been loaded.
Side note; Lato vs. Helvetica Neue vs. Helvetica
You decide, is the Lato font that much prettier?
Lato
Helvetica Neue
Helvetica
In Conclusion

I started this exploration trying to decide if there are better ways I can load my JavaScript files. I did some experiments with some server-side loading and async and defer. I scrutinized my ES6 code to see if there are things I can cut out. Perhaps I should switch to Preact instead of React but then I'd have to own the whole es-lint, babel and webpack config hell that create-react-app has eliminated and I'd get worried about not being able to benefit from awesome libraries like MobX and various routing libraries. However, when I was doing various measurements I noticed that all the tricks I tried, for a better loading experience, dwarfed in comparison to the render blocking CSS and the web font loading.
Service Workers is to web apps, what smartphone native apps are to mobile web pages in terms of loading performance. But Service Workers only work if you have a lot of repeat users.
If you want a fast loading experience and still have the convenience of building your app in a powerful JavaScript framework; focus on your CSS and your web font loading.
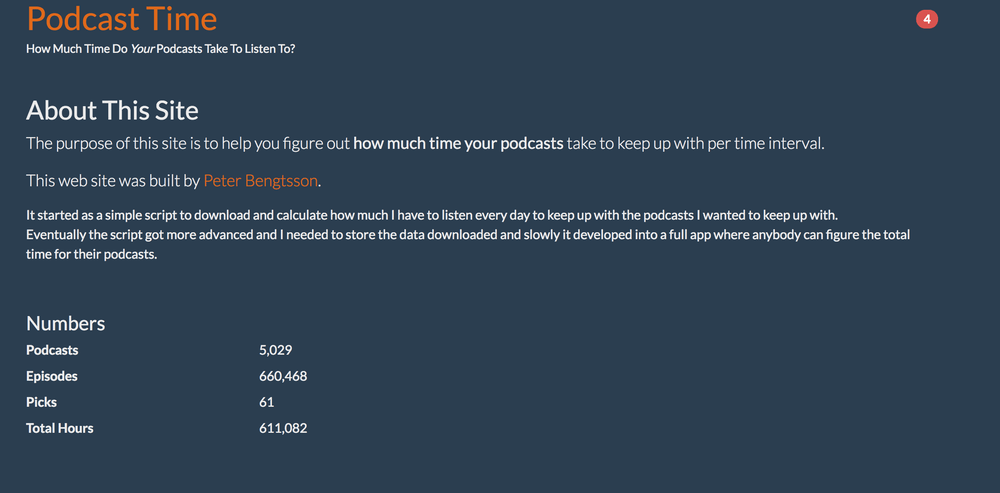
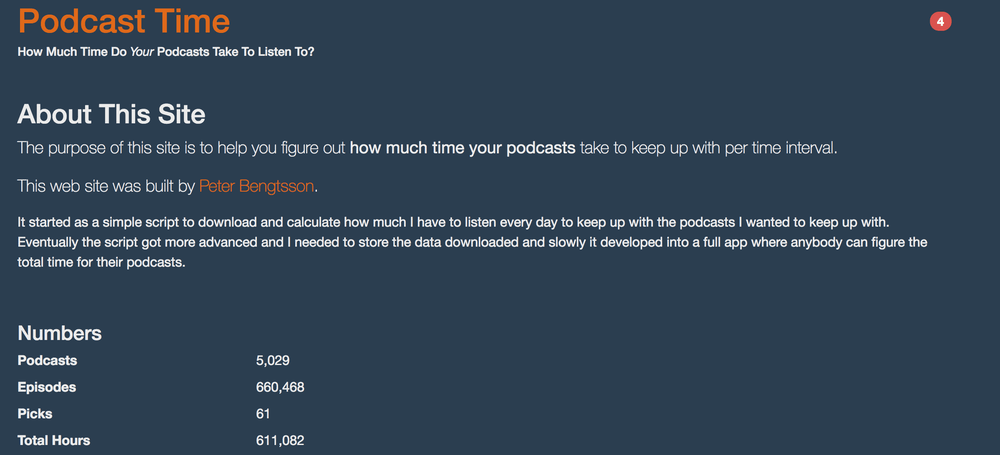
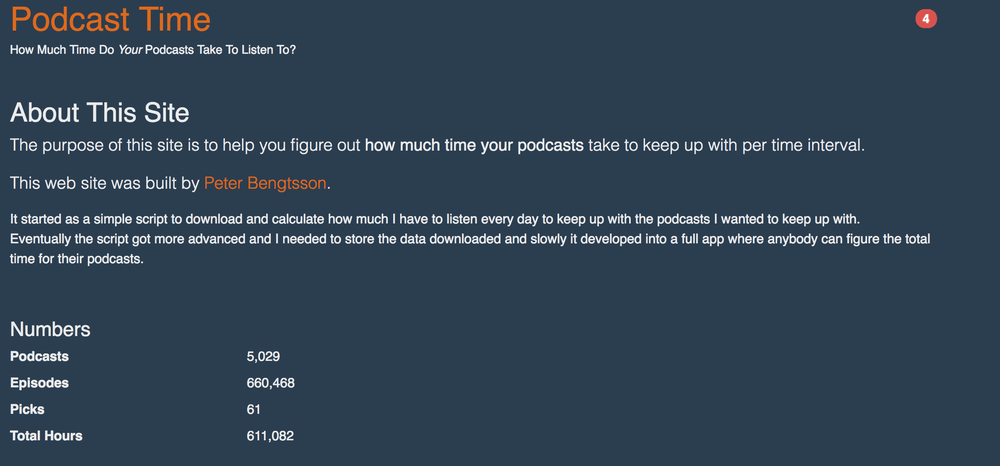
Podcasttime.io - How Much Time Do Your Podcasts Take To Listen To?
February 13, 2017
3 comments Python, Web development, Django, JavaScript, React
tl;dr; It's a web app where you search and find the podcasts you listen to. It then gives you a break down how much time that requires to keep up, per day, per week and per month. Podcasttime.io
First I wrote some scripts to scrape various sources of podcasts. This is basically a RSS feed URL from which you can fetch the name and an image. And with some cron jobs you can download and parse each podcast feed and build up an index of how many episodes they have and how long each episode is. Together with each episodes "publish date" you can easily figure out an average of how much content each podcast puts out over time.
Suppose you listen to JavaScript Air, Talk Python To Me and Google Cloud Platform Podcast for example, that means you need to listen to podcasts for about 8 minutes per day to keep up.
The Back End
The technology is exciting. The backend is a Django 1.10 server. It manages a PostgreSQL database of all the podcasts, episodes, cron jobs etc. Through Django ORM signals is packages up each podcast with its metadata and stores it in an Elasticsearch database. All the communication between Django and ElasticSearch is done with Elasticsearch DSL.
Also, all the downloading and parsing of feeds is done as background tasks in Celery. This got really interesting/challenging because sooo many podcasts are poorly marked up and many a times the only way to find out how long an episode is is to use ffmpeg to probe it and that takes time.
Another biggish challenge is that fact that often things simply don't work because of networks being what they are, unreliable. So you have to re-attempt network calls without accidentally getting caught in infinite loops of accidentally putting a bad/broken RSS feed back into the background queue again and again and again.
The Front End
Actually, the first prototype of this app was written with Django as the front end plus some jQuery to tie things together. On a plane ride, and as an excuse to learn it, I re-wrote the whole thing in React with Redux. To be honest, I never really enjoyed that and it felt like everything was hard and I had to do more jumping-around-files than actual coding. In particular, Redux is nice but when you have a lot of AJAX both inside components and upon mounting it gets quite messy in my humble opinion.
So, on another plane ride (to Hawaii, so I had more time) I re-wrote it from scratch but this time using three beautiful pieces of front end technology: create-react-app, Mobx and mobx-router. Suddenly it became fun again. Mobx (or Redux or something "fluxy") is necessary if you want fancy pushState URLs AND a central (aka global) state management.
To be perfectly honest, I never actually tried combining Mobx with something like react-router or if it's even possible. But with mobx-router it's quite neat. You write a "views route map" (see example) where you can kick off AJAX before entering (and leaving) routes. Then you use that to populate a global store and now all components can be almost entirely about simply rendering the store. There is some AJAX within the mounted components (e.g. the search and autocomplete).

On the home page, there's a chart that rather unscientifically plots episode durations over time as a line chart. I'm trying a library called Plotly which is actually a online app for building charts but they offer a free JavaScript library too for generating graphs. Not entirely sure how I feel about it yet but apart from looking a big crowded on mobile, it's working really well.
A Killer Feature
This is a pattern I've wanted to build but never managed to get right. The way to get data about a podcast (and its episodes) is to do an Elasticsearch search. From the homepage you basically call /find?q=Planet%20money when you search. That gives you almost all the information you need. So you store that in the global store. Then, if the user clicks on that particular podcast to go to its "perma page" you can simply load that podcast's individual route and you don't need to do something like /find?id=727 because you already have everything you need. If the user then opens that page in a new tab or reloads you now have to fetch just the one podcast, so you simply call /find?id=727. In other words, subsequent page loads load instantly! (Basically, it updates the store's podcast object upon clicking any of the podcasts iterated over from the listing. Code here)
And to top that - and this is where a good router shines - if you make a search or something, click something and click back since you have a global store of state, you can simply reuse that without needing another AJAX query.
The State of the Future
First of all, this is a fun little side project and it's probably buggy. My goal is not to make money on it but to build up a graph. Every time someone uses the site and finds the podcasts they listen to that slowly builds up connections. If you listen to "The Economist", "Planet Money" and "Freakonomics", that tie those together loosely. It's hard to programmatically know that those three podcasts are "related" but they are by "peoples' taste".
The ultimate goal of this is; now I can recommend other podcasts based on a given set. It's a little bit like LastFM used to work. Using Audioscrobbler LastFM was able to build up a graph based on what people preferred to listen to and using that network of knowledge they can recommend things you have not listened to but probably would appreciate.
At the moment, there's a simple Picks listing of "lists" (aka "picks") that people have chosen. With enough time and traffic I'll try to use Elasticsearch's X-Pack Graph capabilities to develop a search engine based on this.
At the time of writing, I've indexed 4,669 podcasts, spanning 611,025 episodes which equates to 549,722 hours of podcast content.
The Code
The front end code is available on github.com/peterbe/podcasttime2 and is relatively neat and tidy. The most interesting piece is probably the views/index.js which is the "controller" of things. That's where it decides which component to render, does the AJAX queries and manages the global store.
The back end code is a bit messier. It's done as an "app" as part of this very blog. The way the Elasticsearch indexing is configured is here and the hotch potch code for scraping and parsing RSS feeds is here.
Please try it out and show me your selection. You can drop feedback here.
How to deploy a create-react-app
November 4, 2016
2 comments Web development, JavaScript, React
First of all, create-react-app is an amazing kit. It's a zero configuration bundle that gives you a react app boilerplate with a dev server, linting and a deployment tool. All are awesome but not perfect.
I could go on giving this project praise but if you're here reading this you might be convinced already.
Anyway, the way you deploy a create-react-app project is actually stunningly simple, but there is one major caveat to look out for. Basically running yarn run build will first delete existing files in the ./build/ directory. Files that it indents to replace. For example your ./build/index.html or your ./build/static/js/main.94a86fe3.js.
So, what I suggest is that you deploy it like this:
#!/bin/bash

# Go into the project where the package.json exists
cd myproject
# Upgrade any libraries
yarn
# Use
yarn run build
mv build build_final
Note! This tip is only applicable if you deploy "in place" as opposed to building a whole new container/image and swapping an old container/image for a new one.
Now, for your Nginx point to the ./build_final directory instead. For example:
# /etc/nginx/sites-enabled/mysite.conf
server {
    server_name mydomain.example.com;
    root /full/path/to/myproject/build_final;

    location / {
        try_files $uri /index.html;
        add_header   Cache-Control public;
        expires      1d;
    }
}
The whole point of this tip is that it's a good idea to not point Nginx to the ./build directory (but to a copy of it instead) because otherwise, during the seconds that yarn run build runs (1-5 seconds) a bunch of files will be missing and Nginx will send 404 errors to the clients unlucky enought to connect during the deployment.
4 different kinds of React component styles
April 7, 2016
4 comments JavaScript, React
I know I'm going to be laughed at for having misunderstood the latest React lingo and best practice. But guess, what I don't give a ...
I'm starting to like React more and more. There's a certain element of confidence about them since they only do what you ask them to do and even though there's state involved, if you do things right it feels like it's only one direction that state "flows". And events also only flow in one direction (backwards, sort of).
However, an ugly wart with React is the angle of it being hard to learn. All powerful things are hard to learn but it's certainly not made easier when there are multiple ways to do the same thing. What I'm referring to is how to write components.
Partly as a way of me learning and summorizing what I've come to understand and partly to jot it down so others can be helped by the same summary. Others who are in a similar situation as I am with learning React.
The default Component Class
This is what I grew up learning. This is code you most likely start with and then realize, there is no need for state here.
class Button extends React.Component {

  static propTypes = {
    day: PropTypes.string.isRequired,
    increment: PropTypes.func.isRequired,
  }

  render() {
    return (
      <div>
        <button onClick={this.props.increment}>Today is {this.props.day}</button>
      </div>
    )
  }
}
The old style createClass component
I believe this is what you used before you had ES6 so readily available. And I heard a rumor from Facebook that this is going to be deprecated. Strange rumor considering that createClass is still used in the main documentation.
const Button = React.createClass({
  propTypes: {
    day: PropTypes.string.isRequired,
    increment: PropTypes.func.isRequired,
  },

  render: function() {
    return (
      <div>
        <button onClick={this.props.increment}>Today is {this.props.day}</button>
      </div>
    )
  }
})
The Stateless Function component
Makes it possible to do some JavaScript right there before the return
const Button = ({
  day,
  increment
}) => {
  return (
    <div>
      <button onClick={increment}>Today is {day}</button>
    </div>
  )
}

Button.propTypes = {
  day: PropTypes.string.isRequired,
  increment: PropTypes.func.isRequired,
}
The Presentational Component
An ES6 shortcut trick whereby you express a onliner lambda function as if it's got a body of its own.
const Button = ({
  day,
  increment
}) => (
  <div>
    <button onClick={increment}>Today is {day}</button>
  </div>
)

Button.propTypes = {
  day: PropTypes.string.isRequired,
  increment: PropTypes.func.isRequired,
}
Some thoughts and reactions
-
The advantage with the class is that you can write a
shouldComponentUpdatehook method. That's applicable when you have an intimate knowledge of the props and state and you might know that deep inside the props or the state, there's differences you don't need to consider different enough to warrent a re-render of the component. Arguably, if you're in that rabbit hole and need some optimization hack like that, perhaps it's time to break things up. -
The Stateless Function pattern and the Presentational Component are both functions. Here's what they look like converted to ES5: One and Two. Basically no difference.
-
The Stateless Function and the Presentational Component both suffer from the ugliness of that
propTypesguard hanging outside the code. That makes it the opposite of encapsulated/bundled. You have to remember to copy two things. -
A lot of smarter-than-me-people seem to indicate that classes in JavaScript is a bad thing and I haven't personally understood that argument yet. What I do know is that I kinda like the bundling. You have the whole component in a little package under one name and inside you can put little helper functions/methods that support the render function. Also, having a state in one of those classes is optional. Just because a component doesn't need state, doesn't mean you have to use a functional component. Also, the class is great for putting in side-effects in the
componentWillMountand cancel side-effects incomponentWillUnmount. -
Supposedly with
React.createClass()you can use mixins, but I've never used that. Is mixins something that's rapidly going out of fashion? I think I need to go back and properly read Mixins Are Dead. Long Live Composition. -
Boy I wish there was only one way to do things and only one single name. In Django you used to only have view functions. Then class-based views came along and the diversion caused a lot of strain, anger and confusion. "Why should I use which?! I hate change!" was a common noise. However, JavaScript is what it is and React is newfangled stuff.
-
I kinda like the "statement" you make when you write a stateless/presentational function component. Just by seeing its signature you can tell that it won't mess with state inside. But if your needs grow over time and you realize you need a bit of state solely for that component, you have to rewrite it entirely, right?
-
I love plainly writing down the props I need as argument and not have to write
this.props.myPropthing. Makes it easy to debug what the code does. -
Is there not a way to put that
Button.propTypesthing in the firstReact.Componentstyle into the class?? UPDATE There is! Thanks Emiliano for showing me how. -
If you're prepared to remember more terminology; the class component style is called a Container Component. I like that name!
Please Please Share your thoughts and reactions and I'll try to collect it and incorporate it into this blog post.
Headsupper.io
December 5, 2015
0 comments Python, Web development, Django, JavaScript, React
tl;dr
Headsupper.io is a free GitHub webhook service that emails people when commits have the configurable keyword "headsup" in it.
Introduction
Headsupper.io is great for when you have a GitHub project with multiple people working on it and when you make a commit you want to notify other people by email.
Basically, you set up a GitHub Webhook, on pushes, to push to https://headsupper.io and then it'll parse the incoming push and its commits and look for certain things in the commit message. By default, it'll look for the word "headsup". For example, a git commit message might look like this:
fixes #123 - more juice in the Saab headsup! will require updating
Or you can use the multi-line approach where the first line is short and sweat and after the break a bit more elaborate:
bug 1234567 - tea kettle upgrade 2.1

Headsup: Next time you git pull from master, remember to run
peep install on the requirements.txt file since this commit
introduces a bunch of crazt dependency changes.
Git commits that come through that don't have any match on this word will simply be ignored by Headsupper.
How you use it
Maybe paradoxically, you need to authenticate with your GitHub account but that's in read-only mode and does NOT set up the Webhook for you. The reason you have to authenticate to prepare a configuration on headsupper.io is to tie the configuration to a real user.
Once you've authenticated you get the option to create your first configuration, then you have to enter at least these three piece of information:
- The GitHub "full name". This is the org name, slash, repo name. E.g.
peterbe/django-peterbecomormozilla/socorro. - Pick a secret. Remember what you typed, because you'll need to type in this same secret when you set up the Webhook on your GitHub project's Webhooks page. (This is used to checksum and verify the source of the Webhook push)
- Who to send to. A list of email addresses separated with a newline or a semi-colon.
Once you've set that up, you'll need to go to your GitHub project's Setting page and enter a new Webhook and the URL you need to type in is https://headsupper.io and for the "Secret" type in that secret you used earlier. That's it!
Rules and options
The word that triggers is configurable by you. The default is headsupper. And by default, it's case insensitive. You can change that so it's case sensitive. Also, the word has to be word delimited on the left (e.g. a space or a newline character) and on the right it needs to be a space, a : or a !. So this won't match: theheadsup: or headsupper.
Other optional things you can configure are:
- Which git branch to trigger on (by default it's
master) - Which emails to CC when it sends
- Which emails to BCC when it sends
- Only send when you make a tag
That last option, Only send when a new tag is created, is interesting. I added that option because at work, we make production server releases by pushing a git tag. When a tag is pushed, all those commits are sent to the continuous deployment service which makes a server upgrade. This means you get a chance to enter a heads up message to be emailed to the people who care about new deployments going out.
How it was built
It's a mix between Django and ReactJS. The whole client-side app it built statically with Webpack in ES6. It's served as static files through Nginx. But Nginx is making an exception on all URLs that start with /api or /accounts. The /api/* it used for loading and setting JSON. The /accounts/* is used for the GitHub OAuth endpoints.
What's interesting about this the architecture is that it's using HTTP cookies. Not API tokens. Cookies are quite good in that they're established and the browser does all the automated work of keeping it secure and making each request potentially authenticated.
Here's the relevant React code and here's the relevant Django code that processes the Webhook.
The whole project is available on: https://github.com/peterbe/headsupper.
Also, I made a demo at the November Mozilla Beer and Tell.
How to "onchange" in ReactJS
October 21, 2015
28 comments JavaScript, React
Normally, in vanilla Javascript, the onchange event is triggered after you have typed something into a field and then "exited out of it", e.g. click outside the field so the cursor isn't blinking in it any more. This for example
document.querySelector('input').onchange = function(event) {
  document.querySelector('code').textContent = event.target.value;
}
First of all, let's talk about what this is useful for. One great example is a sign-up form where you have to pick a username or type in an email address or something. Before the user gets around to pressing the final submit button you might want to alert them early that their chosen username is available or already taken. Or you might want to alert early that the typed in email address is not a valid one. If you execute that kind of validation on every key stroke, it's unlikely to be a pleasant UI.
Problem is, you can't do that in ReactJS. It doesn't work like that. The explanation is quite non-trivial:
*"<input type="text" value="Untitled"> renders an input initialized with the value, Untitled. When the user updates the input, the node's value property will change. However, node.getAttribute('value') will still return the value used at initialization time, Untitled.
Unlike HTML, React components must represent the state of the view at any point in time and not only at initialization time."*
Basically, you can't easily rely on the input field because the state needs to come from the React app's state, not from the browser's idea of what the value should be.
var Input = React.createClass({
  getInitialState: function() {
    return {typed: ''};
  },
  onChange: function(event) {
    this.setState({typed: event.target.value});
  },
  render: function() {
    return <div>
        <input type="text" onChange={this.onChange.bind(this)}/>
        You typed: <code>{this.state.typed}</code>
      </div>
  }
});
React.render(<Input/>, document.querySelector('div'));
But what you notice is the the onChange handler is fired on every key stroke. Not just when the whole input field has changed.
So, what to do?
The trick is surprisingly simple. Use onBlur instead!
Same snippet but using onBlur instead
var Input = React.createClass({
  getInitialState: function() {
    return {typed: ''};
  },
  onBlur: function(event) {
    this.setState({typed: event.target.value});
  },
  render: function() {
    return <div>
        <input type="text" onBlur={this.onBlur.bind(this)}/>
        You typed: <code>{this.state.typed}</code>
      </div>
  }
});
React.render(<Input/>, document.querySelector('div'));
Now, your handler is triggered after the user has finished with the field.